This is a step
by step Oracle Database 12c Release 1 installation on Windows Server 2008
(64x).
After
download the software from Oracle website, unzip downloaded files into one
folder and then run the setup file you need to do the following:
1- After launching
Oracle Installer, you may provide your email and Oracle Support password,
otherwise uncheck the checkbox and press NEXT.

2- The next screen
you will be asked if you want to download latest updates from oracle then enter
your Oracle Support credential, for test purpose I’m going to select Skip
Software Updates.

3- Select your
installation options whether to install only binaries or binaries along with
upgrade current database or create new database. Choose your appropriate radio button
and click Next.

4- In grid
installation options screen select the type you want to perform according to the
plan of your installation either Single node or RAC or RAC one node if have one
node you are planning to add more nodes in future.

5- Select your
additional language you might use for your database.

6- Select your
edition which you are going to license.

7- One of the new features
is Oracle Home User which used to run windows services for Oracle Home. If you already
have an account just enter it along with its password or create a new user and
that what I’m going to do.
Note: Oracle 12c supports to use non administrator account and use a standard
account.

8- Enter your
Oracle Base and Oracle Home and then click Next.

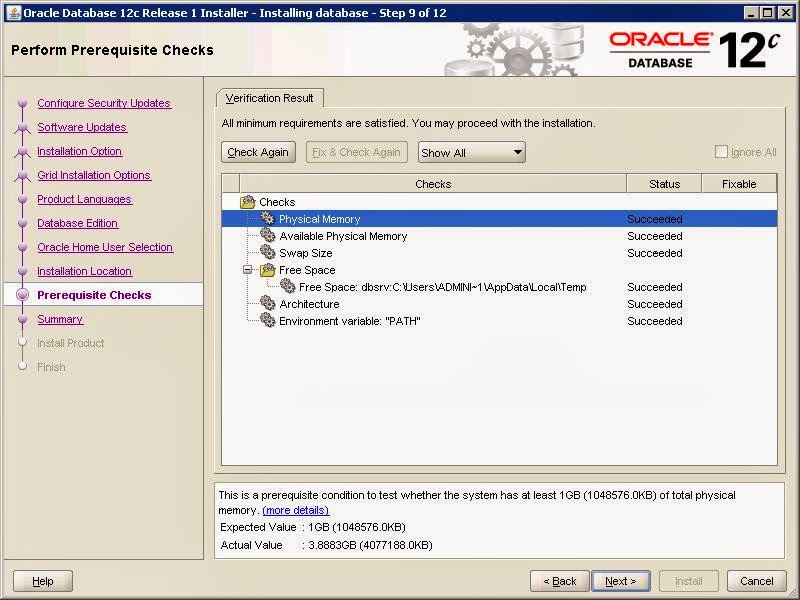
9- Perform Prerequisite
Checks screen will
check the satisfaction of the minimum requirements.
The beauty here is that you can take an action to fix come up issues
without need to re launch the installer once again as it was in previous Oracle
versions.
10- If everything
goes smooth you will end up with Summary screen, showing and summarizing your
inputs. Click Install after review your inputs and if you require changing some
options, click edit beside the option.

The remains two steps only to show the installation progress and the last
step tells that you have finished the installation successfully, then click Finish.
Congratulations now you have the latest version of Oracle Database installed
at you PC or your Server.
No comments:
Post a Comment